It's a good idea to have an image to go along with every blog post you create, especially considering how popular Pinterest has gotten! Now, if you have something like a craft blog or a recipe blog, it's not going to be that hard to simply take pics of what you made and upload them.
But when you have a blog in a different niche — for example, working from home! — it's not quite as easy to come up with images that might attract attention on a site like Pinterest.
In the past, I used to simply take a screenshot of the company logo when I wrote blog posts and left it at that for an image (at least, that's what I did for review posts). But I've known for a while what a big deal Pinterest was and I wanted to see some traffic coming from there, so I've had to get more creative.
Sure you can pin a company logo image to Pinterest, but people aren't necessarily going to click through to it when they don't know what that image really even means, and there is no guarantee they will read your title/description.
The image has to be what grabs them first.
Over the past year, I've found some great tools for creating eye-catching images online for my blog posts. I have used the following sites to dress up the photos I upload to my blog. I can add text to my images — which is important for Pinterest so that people browsing will understand what your posts are about — and I can use them to change colors or brighten, darken images, etc.
You can even use some of them to create new images without even having an existing photo to upload! So, here are some things I use:
1 – PicMonkey
This one is really popular and I use it the most. You can use it to upload your blog photos and add text to them, banners, overlays, lighten/darken images, and more.
There is a bit of a learning curve, but once you've used it for a while, you start to get the hang of it. Trust me that it's WAY easier than trying to learn how to use something like Photoshop or Gimp, and it's free.
PicMonkey is not free. You can do a 7-day free trial and then after that it's $7.99 a month or you can pay annually ($70ish bucks a year).
FYI – I made the image that you see at the top right of this blog post using PicMonkey. I just downloaded an image from a stock photo site (you can use Pexels for free images), created a rectangular overlay that I stretched across the image, and then added the text.
Go here to check out PicMonkey. I'd also recommend enrolling in Suzi Whitford's free PicMonkey e-course for more detail on how to use it to make images for your blog.
2 – Canva
Canva is very, very similar to PicMonkey, but they have some neat pre-made templates you can use to create images with pretty quickly.
Canva also has a feature where you can buy your blog images directly from them, then dress them up. You can buy just one image at a time for $1 each and I think they also have some free images. This is a great feature considering that many of the stock photo sites charge a lot for buying credits to use their images!
I have used Canva and I do like it, but I find there is more of a learning curve with it than PicMonkey. However, Canva does have some great tutorials you can watch that teach you exactly how to use their tools.
Go here to check out Canva.
3 – Stencil
I've used this one before a bit, and I love how easy it is! Plus, the site is very fast.
It used to be called Share As Image. It's actually an extension you can install for your Chrome browser. Basically once it's installed you can create on-the-fly images for pretty much anything.
You can either upload your own images and then add text to them or use some of the colorful, eye-catching images and patterns that Stencil offers for free.
Once you've made your image, just specify what you want it to link to and then share on Facebook, Twitter, Pinterest, Google Plus, or share via Buffer if you use Buffer.
It really streamlines the process of creating an image fast and attaching it to one of your blog posts for the purpose of gaining social media traffic. You can also download the images you make and insert them into your blog posts.
Stencil does have a Pro option as well that lets you create your own watermarks to place on the images you make. This would be your site name or URL printed in small letters at the bottom of the image or your logo.
Having a watermark makes it harder for people to steal your images and claim them as their own. Going Pro also means having a wider variety of images you can edit available from Share as Image.
If you don't go Pro, all the images you create will have the Stencil URL at the bottom, but they can still link to your website or be used on your website.
Go here to check out Stencil. It's free for up to 10 images a month, or you can pay $9 a month for up to 50 images plus other account features.
4 – Fiverr
If you absolutely don't think you can make your own blog images, or you need a better-looking blog logo, banner, or button, don't forget that Fiverr is an option.
There are some super talented graphic designers who sell their services on Fiverr, and the only cost to you is $5. I have purchased graphics from Fiverr before and my experience has been positive.
Just make sure that whoever you use has a portfolio that looks good to you and has mostly good feedback from previous buyers.
Go here to browse Fiverr for a graphic designer.
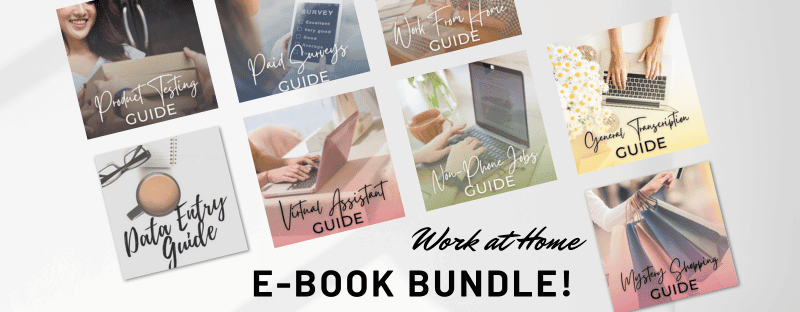
BONUS – Get My Work at Home E-Book Bundle For Just $5 Right Now (8 E-Books Total)
If you are wanting even MORE links to jobs across a ton of categories (virtual assisting, data entry, transcription, and more), you may want to download my work at home e-book bundle.
It includes the following e-books ($1 each if you buy them individually):
- Your Quick Guide to Legit Work From Home Jobs
- Your Quick Guide to Non-Phone Jobs From Home
- Your Quick Guide to Data Entry Jobs From Home
- Your Quick Guide to Working at Home as a General Transcriber
- Your Quick Guide to Working at Home as a Virtual Assistant
- Your Quick Guide to Taking Paid Surveys For Extra Cash
- Your Quick Guide to Getting FREE Products to Test & Keep
- Your Quick Guide to Making Money as a Mystery Shopper
DOWNLOAD IT HERE.
You will get an email with a link to download the PDF files after your purchase.
Thank you!

Anna Thurman is a work at home blogger and mom of two. She has been researching and reviewing remote jobs for over 13 years. Her findings are published weekly here at Real Ways to Earn.


Hi Anna!
I’m new to the blogging word and found this post via Pinterest! I’m just wondering… Do you know if you can make photo collages with any of these sites? I’d love to make some “gift guides” for my blog like I’ve seen many others do on Pinterest but I’m not sure what’s the best way to make them?
Thanks in advance!
Emma
www.emmasexploring.com
Hi Emma, Yes you can make photo collages with many of them. I know for a fact you can do it very, very easily with PicMonkey.
Thank you so much for this post. I really appreciate this very much. Super helpful!
Hi Anna
Thanks for your helpful information, can one use photos from the manufacturers websites when writing about their products?
Regards
I think that’s OK as long as credit is given, but you may want to do some research to be sure.
I love Canva- I’ve used it to create images for my work newsletter, and I also used it to create an image that I was thinking about using in my book cover. Will have to check out some of the other resources…
Excellent options, Anna! I use them all in one way for another.
I love Canva, but have never heard of Pic Monkey. Thanks for all of the great resources, Anna.